Review of the recent evolutions and new features of Mailify
New features, optimized user experience, improved existing features, the Mailify team has been working hard over the past few months to bring you an innovative and exciting last quarter. This article offers you an overview of the main new features released in the last few months. We invite you to discover them and test them directly on the application.
New features on forms and landing pages
Smart Templates for web pages
As a reminder, the Smart Templates feature of Mailify was previously used to create in one click email and newsletter templates in your company’s colors by analyzing your graphic charter by simply entering the URL of your website.
Mailify has upgraded the Smart Templates feature to offer you the possibility to create your own web templates.
How does Smart Templates for web pages work?
It is exactly the same concept as Smart Templates for email templates but this time, the template creation algorithm is customized for landing pages.
By simply entering the URL of your website, Mailify automatically generates a dozen landing page templates in your company’s colors (webinar, welcome offer, newsletter registration confirmation, white paper, etc.).
To learn more about this new feature, you can read our blog post dedicated to this topic.
Integrate forms in your landing pages
A form is an excellent way to enrich your contact list and to get data about your prospects to contact them later with a targeted message. Mailify now allows you to enrich your landing pages with existing forms whatever the publication mode (dedicated page, pop-up or block to be integrated).
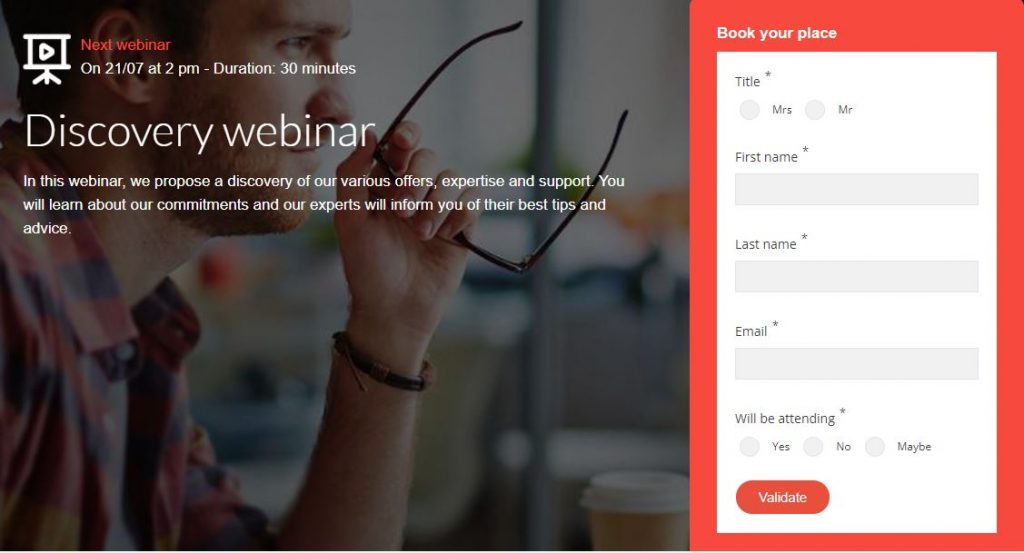
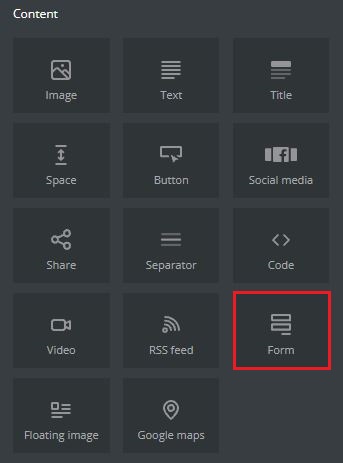
To do this, when editing your page, simply drag & drop a form content and select the form of your choice.
Receive a notification for each reply to your forms
Another innovation concerning forms was released at the beginning of the summer: you can now receive an alert or send one to your collaborators when a contact fills in one of your Mailify forms.
Why notify your teams of the replies to your forms?
A better management of your events: follow in real time the progress of the registrations thanks to the notifications. Anticipate your needs according to the number of people registered and optimize the reception of the participants.
Optimized sales performance: notify your sales teams instantly of each new request sent through a form and ensure that your prospects are contacted quickly.
Reduced response time: notify your customer service instantly of an incoming request from one of your online forms to reduce response time.
How to set up the notifications in Mailify?
Step 1: Access the notification settings
You have two possibilities:
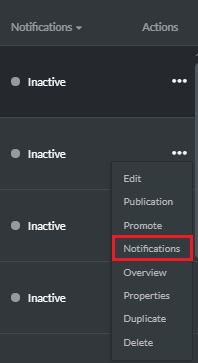
- From the form index, access the notification management by clicking on the “Notifications” section of the “Actions” menu of the form.
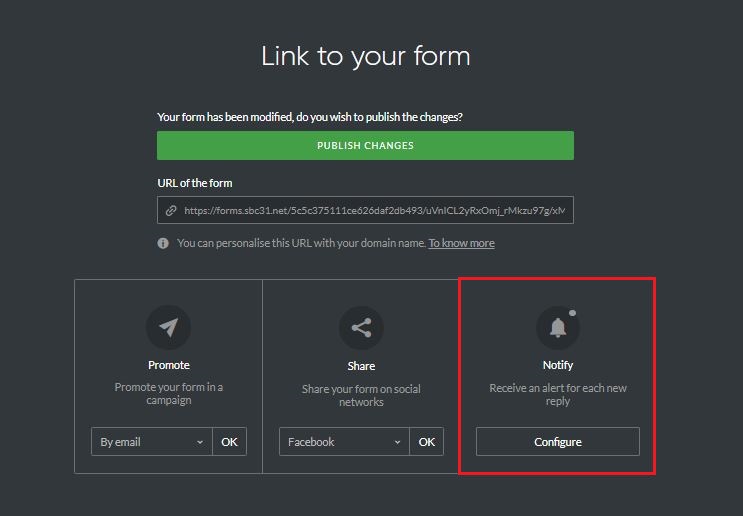
- From a form being created, go to the publication step of your forms and click on the “Notify” section.
Step 2 – Determine the notification channel
Choose the notification channel of your choice: Email, SMS or Webhook
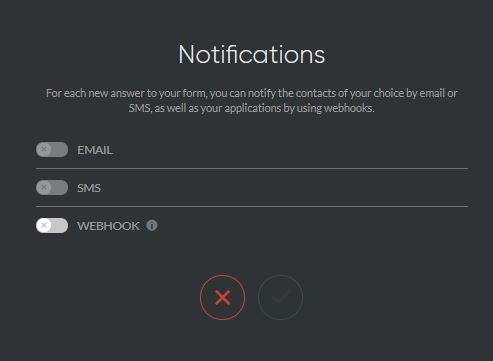
Step 3 – Identify the recipients to be notified
- Email notification: enter the email address of the recipient(s) to be notified and validate.
- SMS notification: enter the phone number of the recipient(s) to be notified and validate.
- Webhook notification : enter the webhook address to be notified and validate. Please note that you can only enter the address of one webhook.
You are an international company and wish to notify your non-French speaking subsidiaries?
You can also choose the language of the email and SMS notifications: French, English, German, Spanish, Portuguese or Dutch.
That’s it! You and your teams will now be advised in real time on the channel of your choice whenever there is a new response to your forms.
Insert an anchor in your landing page
Our teams have continued to improve our landing page editor by adding the possibility to choose the target of hyperlinks (stay on the same page / open in a new tab).
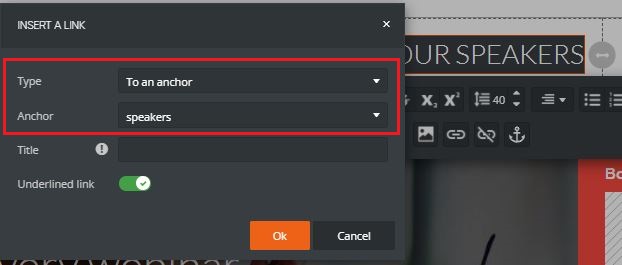
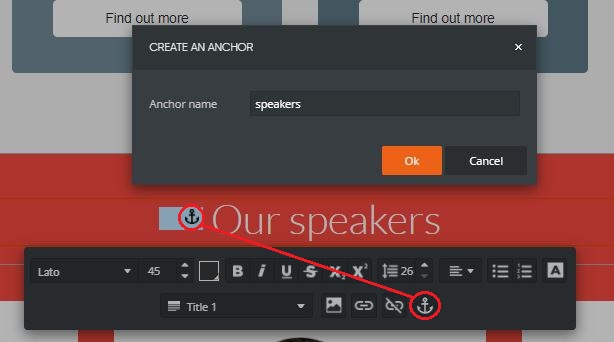
This optimization allows you to add anchors within your pages, and to point your links – internal or external – to these anchors.
A better management of marketing pressure
What is marketing pressure?
In email marketing, it is the total number of marketing emails received by a recipient over a given period.
Reminder: how to set the marketing pressure in Mailify?
Mailify gives you the possibility to define a maximum level for marketing pressure in order to identify potentially over-solicited recipients.
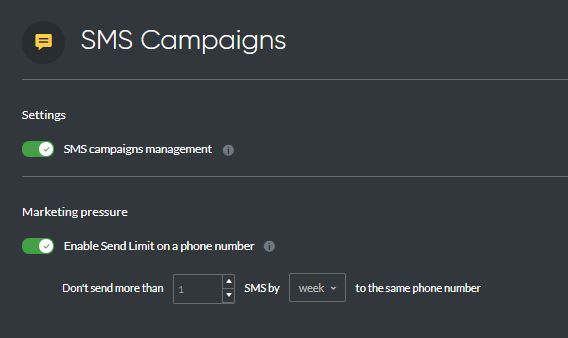
To do so, go to the “Settings” section of your account, then to “Email campaigns” or “SMS campaigns”. You can then define a maximum level of marketing pressure for your contacts. In fact, this means determining a maximum frequency of messages sent per contact over a given period.
For example, you can define that a contact should never receive more than 8 emails per week. Thus, a contact will be excluded from your campaigns if he has already received 8 campaigns in the last 7 days.

For example, for SMS campaigns, you can decide that a contact should never receive more than 1 SMS per week. Thus, a contact will be excluded from your campaigns if he has already received 1 SMS campaign in the last 7 days.
A new feature to manage marketing pressure
When you launch the contact analysis in the “Recipients” step of your campaign, you can now exclude oversolicited contacts (under marketing pressure). The option is checked by default. If you want to, you can then re-include all or part of the excluded recipients.
At the “Test and Send” step, the recipients are automatically excluded (except those you have manually reincluded)
NB: automatic campaigns are not impacted, automated mailings are counted in the calculation of the marketing pressure.
The practical extras
The essential non-breaking space
What is a non-breaking space?
The non-breaking space is a character similar to the “space” character, except that it is used when you don’t want this space to be cut off at the end of a text line. The idea is to prevent the two elements separated by this space from being separated on two different lines.
When should you use the non-breaking space?
Here are the most common situations in which you should use the non-breaking space.
Numbers: numbers should not be separated from the word they refer to. For example, if you write “An email credit is equivalent to an email sent to a recipient as long as this email has a total weight not exceeding 194 Kb”, it is customary not to end up with “194” at the end of the line and “Kb” on the next line. A non-breaking space should then be used.
Percentages: mathematical symbols always use non-breaking spaces. For example, you don’t want the “%” symbol to be able to separate from the number on another line in the phrase “Marketing emails have an average open rate of around 25%”.
How to insert a non-breaking space in Mailify?
Nothing could be easier, a simple combination of touches Once in the EmailBuilder, place your cursor where you want to insert the non-breaking space and press simultaneously the keys:
ctrl + shift + space.
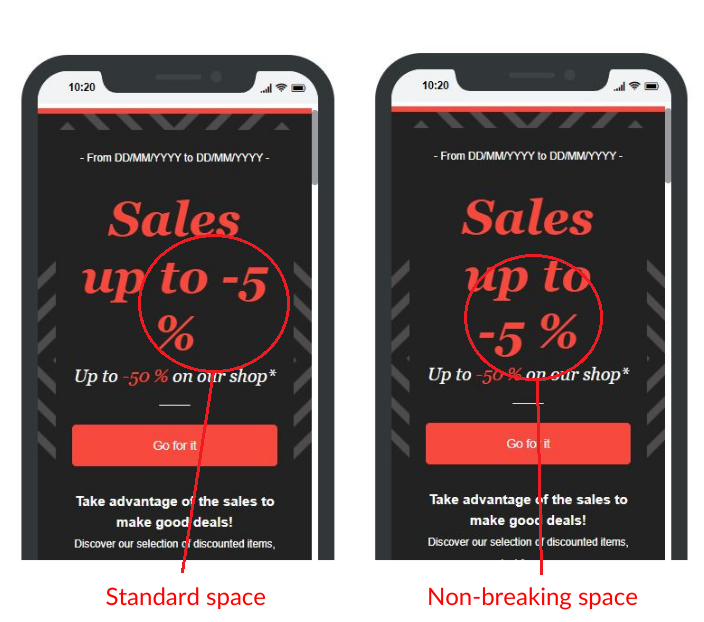
That’s it! You should no longer have to deal with the problem of a punctuation mark being left out on a line!
Various improvements for the management of automated campaigns
Improved management of stop conditions for automatic campaigns
We have implemented a new stop condition for your automatic scenarios. Until now, it was possible to stop a scenario as soon as the value of a field was null, or was equal to a specific value. From now on, it is possible to stop your scenario when the field is filled, whatever its value.
Possibility to insert short URLs
Another new feature for automatic campaigns is that we have updated the insertion of links in SMS messages. From now on, it is possible to use short URL domains to shorten your links and to incite your contacts to action more easily.
As a reminder, you can find all the optimizations and corrections made to Mailify on this page.

No Comments